Most people when applying for a new passport, they will look
forward to the professional photographer, but then this can be expensive. Now,
if you know how to make use of image-editing software-Photoshop and a home
printer, you can produce a good quality photos that meet the official
standards and requirements.
Here, let me share some simple tips on using Photoshop to create your own 2x2 size photo.
Here, let me share some simple tips on using Photoshop to create your own 2x2 size photo.
STEP 1
Go to “File” and select “Open”. Choose the picture and open the selected image.
STEP 2
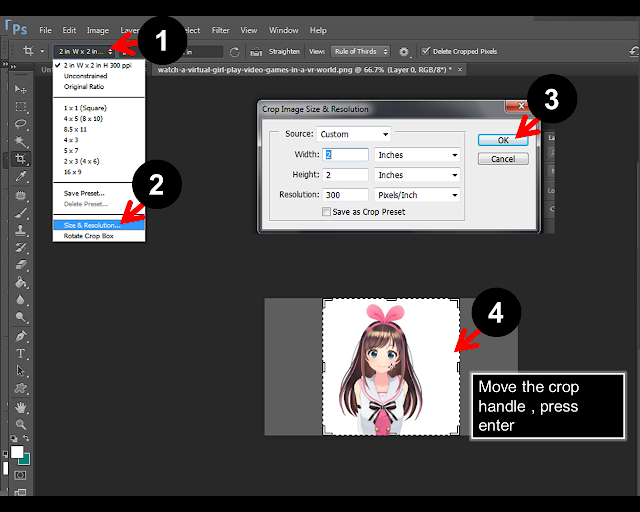
Select the “Crop Tool”, change the width to 2in and height 2in, Resolution: 300 pixel/inch.US passport sizes is 2” by 2”.
STEP 3
Go to option bar below the menu bar, select size and resolution, set the width and height to 2x2(width and height). Press OK, save the crop preset. Move the crop handle until you get the desired size. Press Enter

!: Try to add stroke around the cropped picture. It is easy to cut the 2x2 if it has an outline

STEP 4
Create a
new document. Go to “File “, select “New”. Set
the preset size to US Paper: Choose Letter size, Mode RGB color and click “OK” This
will create a new layer.


Step 5
Select the move tool, drag the image to the other tab or left click the
tab of the image, drag the image to the new document or project.
Final Output

Another way to copy
Hold “ALT”key and using the “move tool” to drag the image to the new layer. Repeat it twice and now you get 2 images in one layer. You almost done.


